HOME | QUICK START | IN DEPTH | ABOUT ME | ABOUT APP

In Depth Tutorial on Using GridTracks
Analyzing Data through the General Journal and General Ledger
Note that once you have finished adding all your accounts and journal transactions, you are done! Everything else will be done for your by GridTracks.
This section will show you how to analyze your data from the General Journal and General Ledger.
The General Journal
As mentioned in the previous section, the Journal page is where you can see the General Journal. From the image taken from the previous section, this is what the General Journal looks like with journal entries in it.
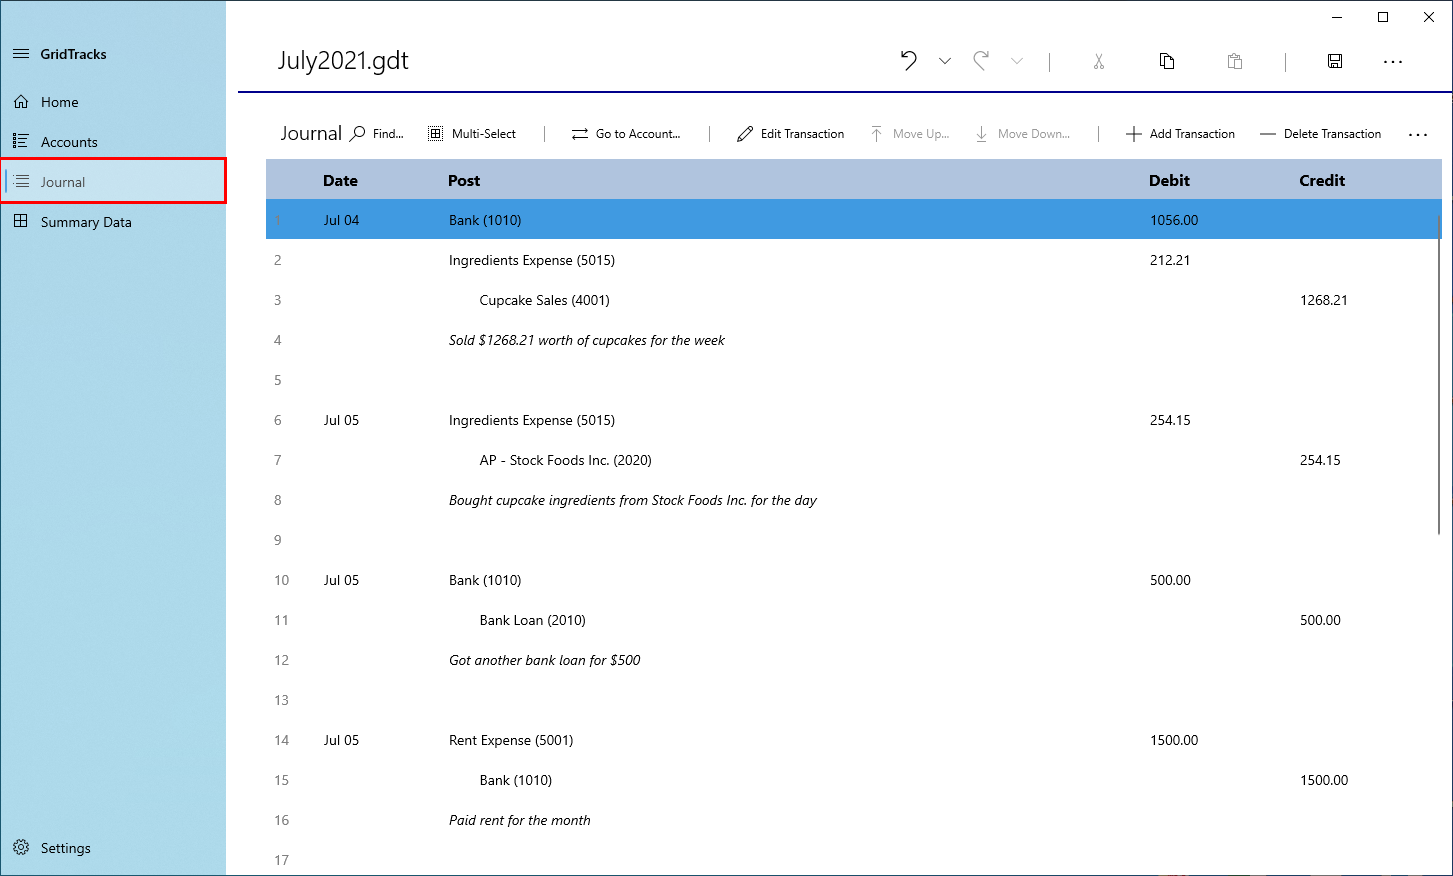
Note that the General Journal contains all transactions inputed into the system. All transactions are sorted by date (but not time). You can manipulate transactions in the General Journal by the commandbar located at the top of the Journal page.

Here you will see:
-
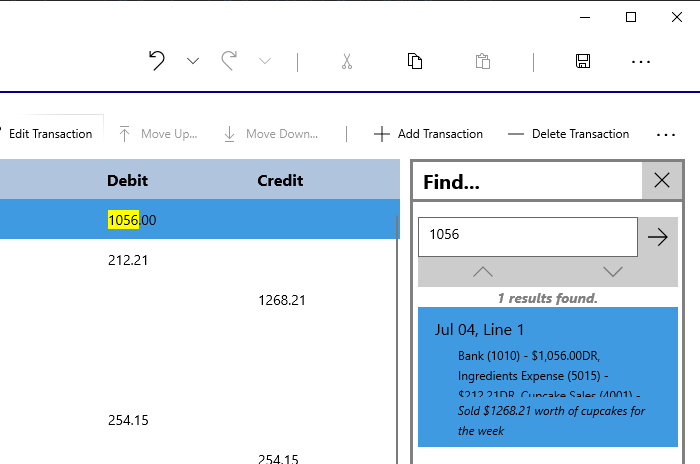
Find
This will open a side pane where you can type text to find journal entries.
-
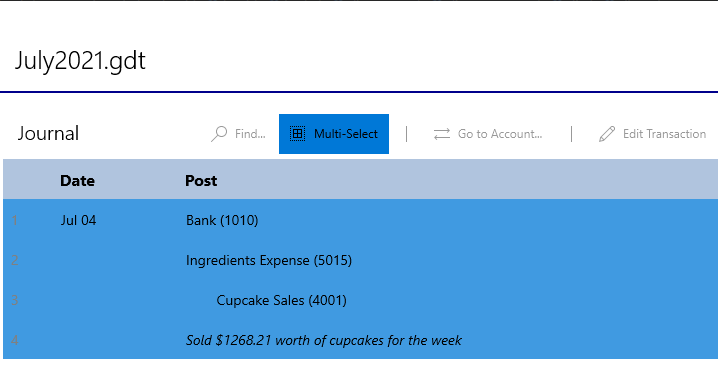
Multi-Select
This will allow you to select multiple journal entries for selection, for the purpose of copying. Note that for simplicity's sake, all other Journal page commands will be disabled.
-
Go to Account…
Depending on the journal entry selected, hitting this will take you to the General Ledger (Accounts page), where this entry will be selected. More on this later in this section.
-
Edit Transaction
As described in the previous section, hitting this will allow you to go the Journal Edit page, where you can modify the selected transaction in question.
-
Move Up…
Being that transactions are only sorted by date and not time, if you wish to move a transaction above another with the same date, this command will allow you to do so. This way, if you are inputing data from another financial dataset, you can make sure that the entries will match up in order.
-
Move Down…
Just like with the Move Up… command, you can use this to move a transaction down, provided that the following transaction has the same date. This again allows you to fine-tune the order of transactions that have the same date.
-
Add Transaction
As mentioned in the previous section, this command will take you to tbhe Journal Add page, where you can go through the process of adding a new transaction.
-
Delete Transaction
This command will simply delete the selected transaction in the journal.
The General Ledger (Accounts page)
If you go to the Accounts page shown below, you will have access to the General Ledger. This allows you to see how the journal transactions you inputed affect the various accounts you wish to keep track of.
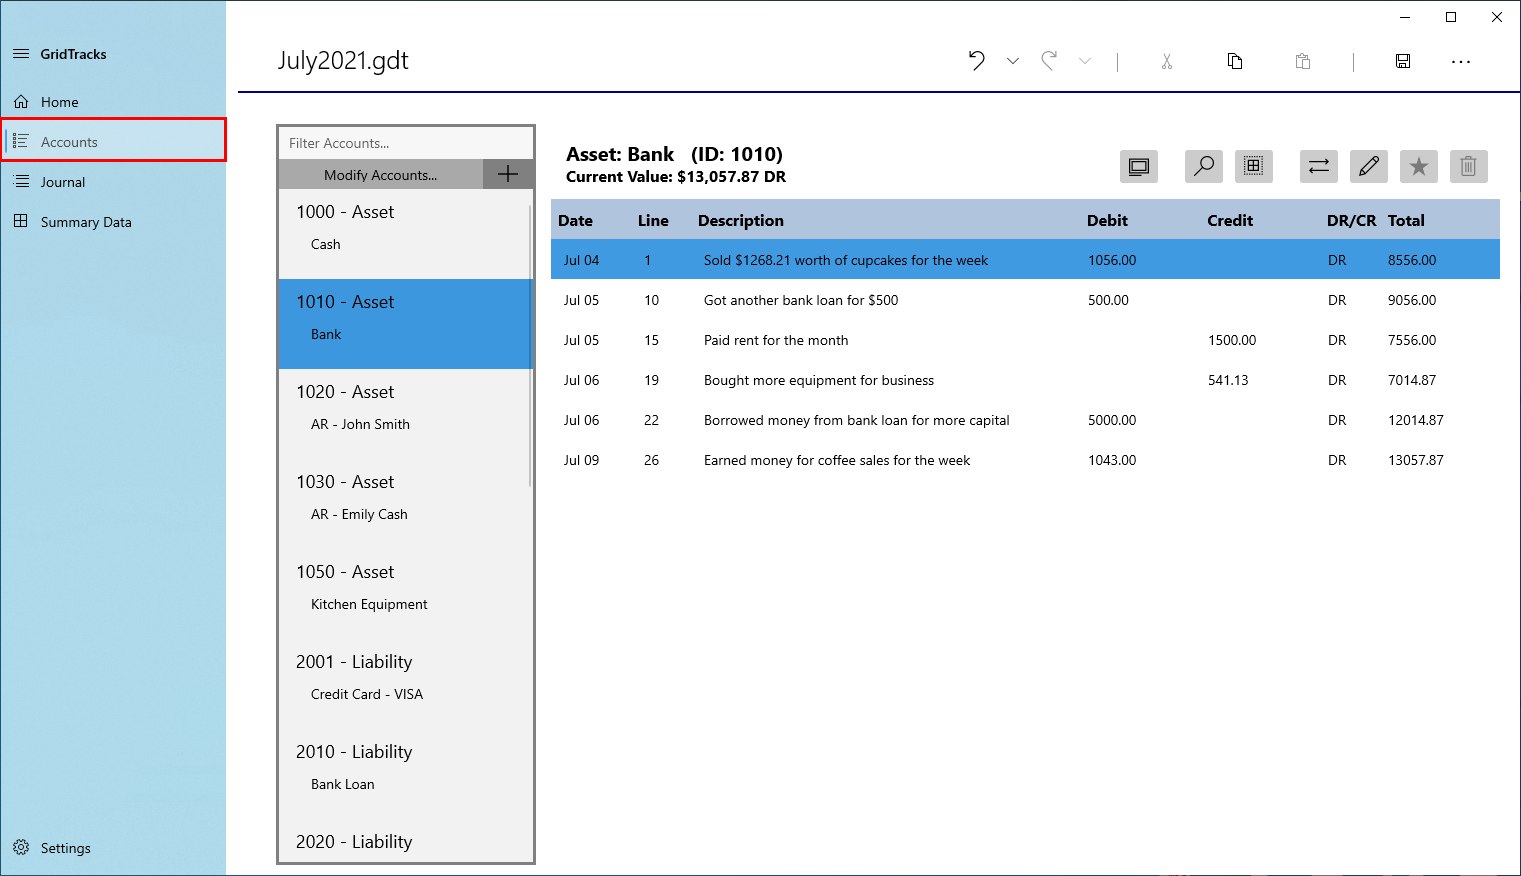
In this page view, you can view all the accounts in the General Ledger. Here you can see how the tranasctions you have inputed affect your accounts.
Note that on the lefthand side of the page, there is a listview that shows all available accounts. By clicking on one of them, you are activating the account and the pane of the right will show information for that particular account.
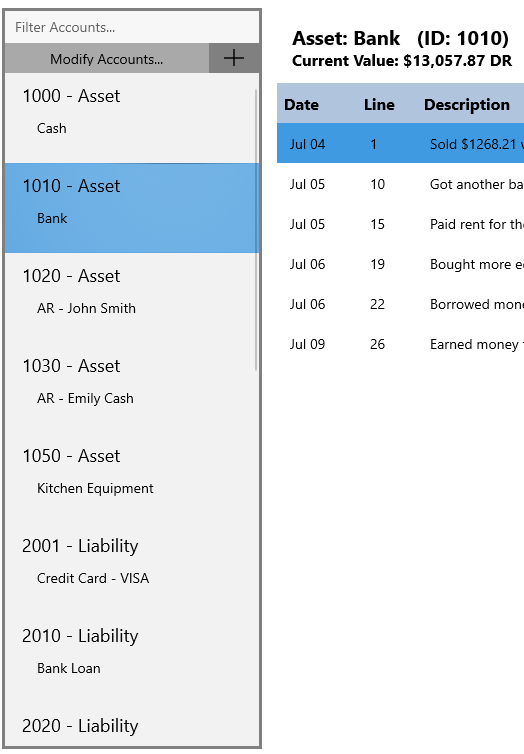
Note that at the top you have a textbox that will allow you to filter your accounts list, to more easily find the account you wish to analzye.
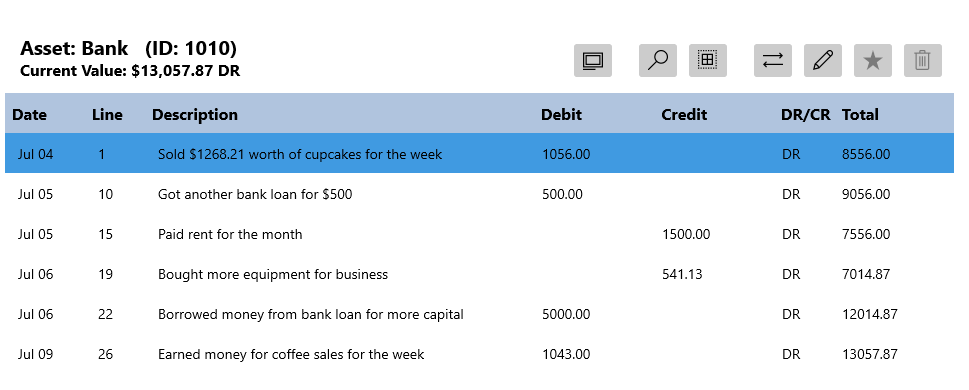
Here I have selected the Bank account. Note that on the top left, you are greeted with the account type, name, ID, and current value.
For each column of the account entries list:
-
Date
This represents the date of the journal transaction.
-
Line
Note that every entry in the General Journal has a line number, including the description lines and blank lines. This line number represents the line number of the debit/credit post in the General Journal (description and blank lines will not show up here).
-
Description
As every journal transaction has a description, the general description from the General Journal will be used in each corresponding account entry (the same description is used for all debit and credit posts from the General Journal for the one transaction).
-
Debit/Credit
This part represents the amount of capital debited or credited to an account. Note that only one of these columns should be filled in; the other blank column represents the fact that no debit/credit occurred.
-
DR/CR
As accounts cannot have "positive" or "negative" values, this is represented by a debit or credit balance. If this column has 'DR', this means the total has an overall debit balance, while if this column has a 'CR' value, than the total has an overall credit balance.
-
Total
The total of the account at this point in time.
Note that at the top right corner you have access to various controls that affect the active account.

-
Account Description
This will open up a giant rich text block for you to add auxillary information that you wish to keep about this account. If it is inventory, you may want to record the number of items purchased and their prices and such. If payroll, you may want to add in the personal information of a particular employee.
-
Find…
This will open the Find pane, where you can enter text to search for in the account entries.
-
Multi-Select
This will allow you to select multiple account entries within the account, for selection copy purposes. Note that all other account modification commands are disabled when in multi-select mode.
-
Toggle to Journal
Note that each account entry of the General Ledger has a line number, which is in reference to a journal entry in the General Journal. Toggling to the General Journal will take you to the journal entry with the associated line number.
-
Edit Account
This will open a dialog box that will allow you to edit the Account ID, Account Name, Account Type, and Starting Value of the active account.
-
Toggle Active/Deprecated
There may be times that you have an account that you no longer need. For example, if John Smith was a customer but recently he retired, you may want to remove this account when creating subsequent files during the carry-over process. This can be accomplished by "deprecating" an account. When an account is deprecated, it will not show up when you create a new file with the updated starting values. Note that in order to deprecate an account, it must have a current value of $0.00.
-
Delete Account
This will delete an account provided that it has no account entries (this command is disabled when an account has account entries). The general purpose of this delete an account that you created by accident. Note that if the account has a non-zero starting value, it is up to you to adjust the starting values of the other accounts so that everything remains balanced.
Next Steps
- More on General Journal Transactions
- Dealing with Inventory and Sales
- Payroll
- Asset Depreciation
- Paying and Collecting Interest
- Finalizing Data
- Viewing Summary Data (Balance Sheet, Income Statement)
- End-of-Period Preparations
Credits
Please note that most of the information from this site is taken from the book "Bookkeeping for Canadians for dummies" by Lita Epstein and Cécile Laurin.
(Epstein, L., & Laurin, C. (2019). Bookkeeping For Canadians For Dummies. Hoboken, New Jersey: John Wiley & Sons, Inc.)