
Quick Start Guide
Navigation
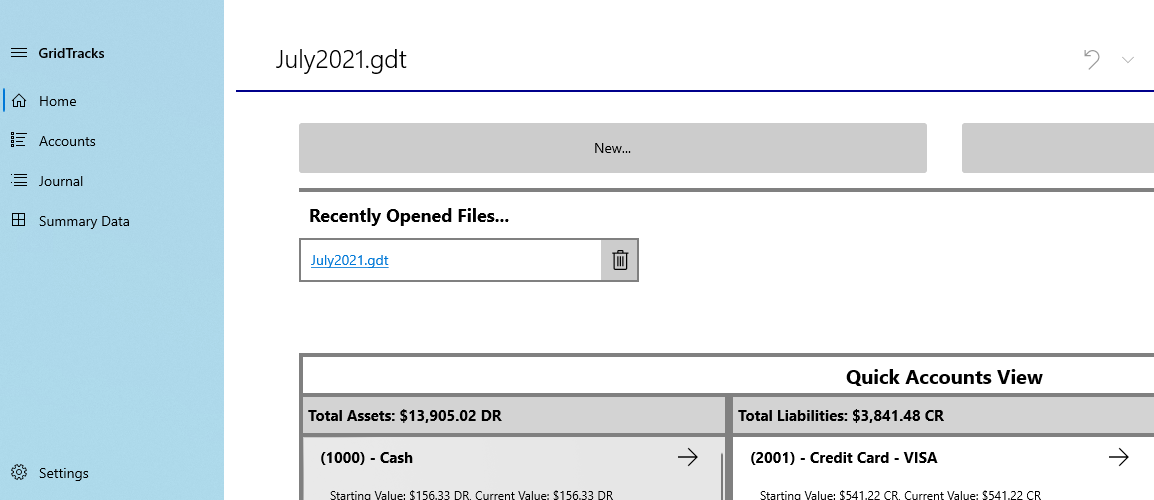
Note that when you open GridTracks, you will be greeeted with this navigation menu on your left-hand side. You will have access to the Home, Accounts, Journal, Summary Data, and Settings pages. Click on the links in the previous line for more details.Note that the titlebar also contains Undo/Redo, Cut-Copy-Paste, Save, Save As…, Export to Excel, and a Feedback Button on the top-right corner.
Quick Start Instructions
More on each page:
- Home
- Accounts
- General Journal
- Summary Data
- Settings
Note that if this is the first time using the app, I recommmend starting with the Accounts page, as you must first create accounts before you can add anything to the General Journal. Of course, after that you should check out how to use add/edit transactions in the General Journal. After that, look at Summary Data, where you can view your balance sheet and income statement. Furthermore, the Settings page will allow you to customize your balance sheet and income statement, as well as help you prepare for subsequent accounting files. Finally, the Home page offers you a quick way to jump to various points in the GridTracks document.
Settings
Information for Balance Sheet and Income Statement
At the top of the Settings page
At the top of the Settings pageAt the top of the Settings pageAt the top of the Settings page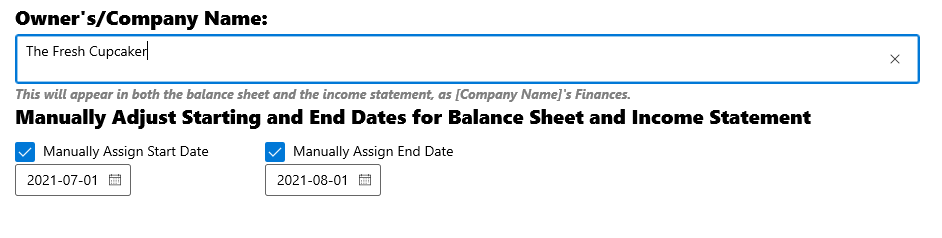
| Task | Steps |
|---|---|
| Change Company Name |
This textbox allows you to change the name of your company. This is important as it will show up on your balance sheet and income statement as shown below. .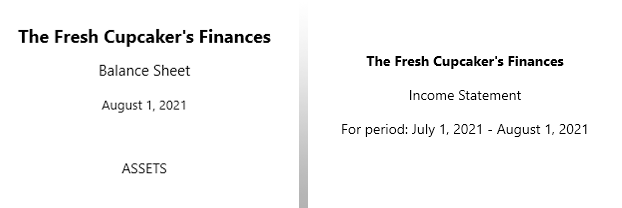
|
| Modify start and end dates for Summary Data |
Furthermore, you have the option of providing a start date and end date for your statements. Note that only the end date is needed for the balance sheet, while the income statement needs both a start date and end date. If either is not provided or both are not, then the start date will be set to the date of the first entry in the journal, while the end date will be set to the date of the last entry. |
Applying closing entries and/or Preparing for Next Account Period
On the second half of the Settings page
Here you have the option of applying closing entries, as well as preparing for the next accounting period.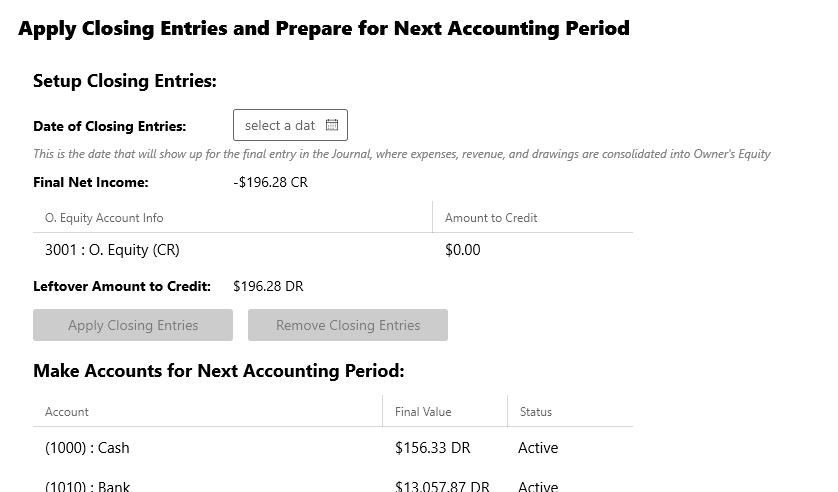
| Task | Steps |
|---|---|
| Applying O. Equity Delegates |
The purpose of applying closing entries is to consolidate total revenue, total expenses, and total O. Equity (DR) into O. Equity (CR). This is useful at the end of a given accounting period, of which we are no longer interested in keeping track of revenue, expenses, drawings, and dividends over a specific period of time. In order to properly applying closing entries, the net income mentioned above must be transfered to O. Equity (CR). Because there may be multiple O. Equity (CR) accounts, it is up to the user to determine how much is consolidated into each of these accounts. 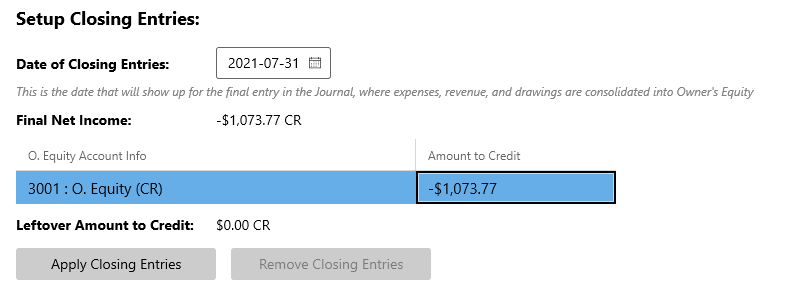
Note that given a valid closing entry date (mentioned more below), as well as allocating the total net income to such that Leftover amount to Credit is $0.00 CR, enables the button to apply closing entries. Even though this particular example only has O. Equity (CR) account, the process for multiple O. Equity (CR) accounts is the same—it is possible to apply closing entries provided that Leftover amount to Credit is still $0.00 CR. |
| Apply/Remove Closing Entries |
Once all of net income has been distributed to the various O. Equity (CR) accounts, the date for the closing entry must be set. Please note that this date must occur on or after the last date in the journal, and also before or on the specified End Date above. The closing entry cannot be applied if this is not the case. 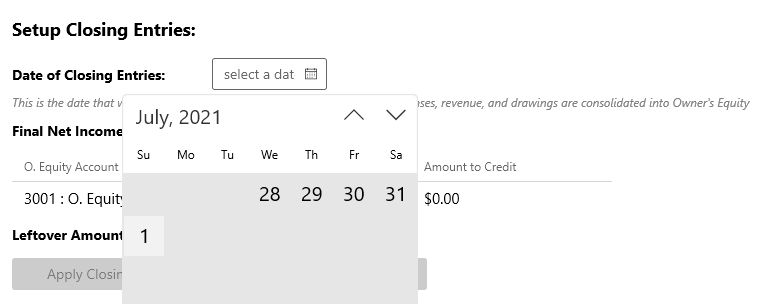
Note that applying closing entries will create a final post in the General Journal. Once closing entries have been applied, you can no longer add/edit/delete a transaction, nor can you add/edit/delete an account. However, you can still view the file and toggle from page to page. Below is a sample closing entry that would be applied to the end of the General Journal: 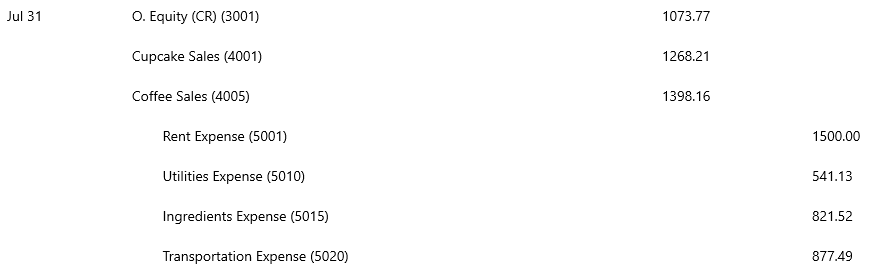
|
| Prepare for Next Period |
In order to break down the timeline of your transactions into manageable portions, it is recommended that you create a new file around every month or so. By using the File for Next Accounting Period, all active accounts will be added to a new file, with their starting values originating from the ending balances of this current document. Note that deprecated accounts, which, by virtue of deprecation are no longer used, will not show up in the new file. Again, deprecated accounts must have a closing balance of $0.00, and if you please, you can deprecate accounts directly in the control, as shown below: 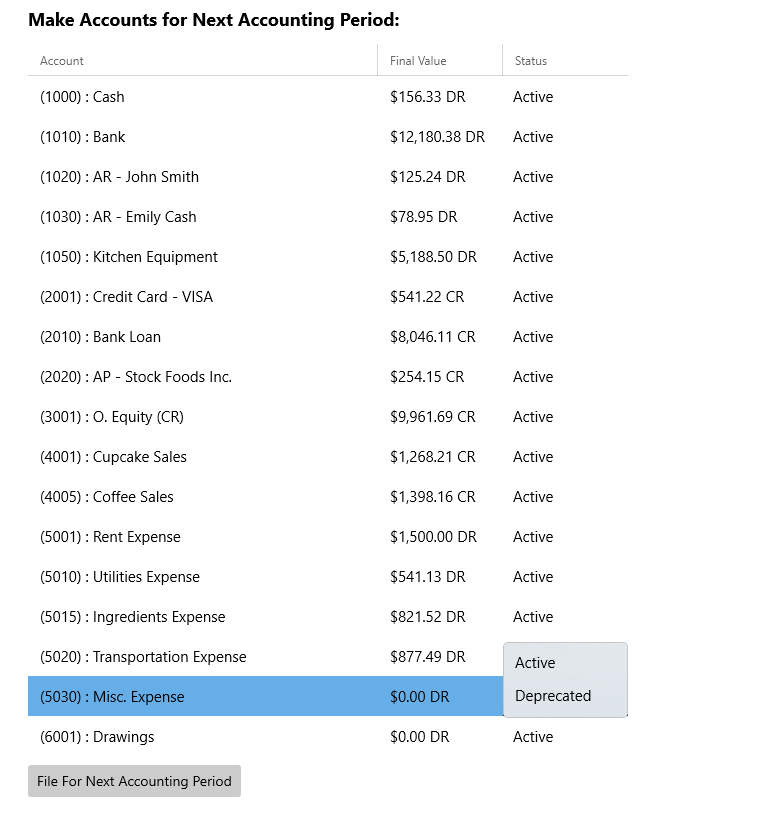
Please note that you can prepare for the next period regardless of whether closing entries have been applied or not. |