
Quick Start Guide
Navigation
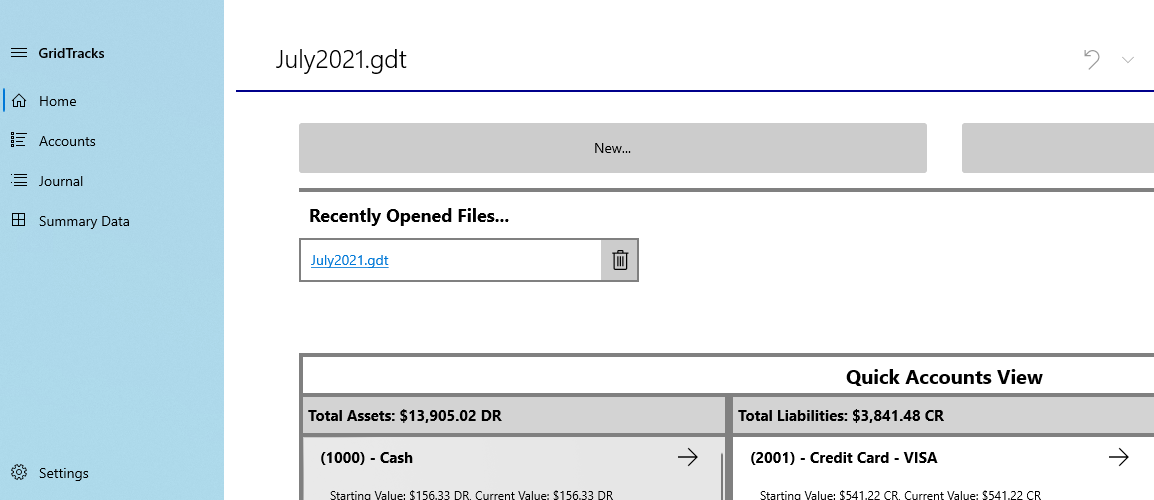
Note that when you open GridTracks, you will be greeeted with this navigation menu on your left-hand side. You will have access to the Home, Accounts, Journal, Summary Data, and Settings pages. Click on the links in the previous line for more details.Note that the titlebar also contains Undo/Redo, Cut-Copy-Paste, Save, Save As…, Export to Excel, and a Feedback Button on the top-right corner.
Quick Start Instructions
More on each page:
- Home
- Accounts
- General Journal
- Summary Data
- Settings
Note that if this is the first time using the app, I recommmend starting with the Accounts page, as you must first create accounts before you can add anything to the General Journal. Of course, after that you should check out how to use add/edit transactions in the General Journal. After that, look at Summary Data, where you can view your balance sheet and income statement. Furthermore, the Settings page will allow you to customize your balance sheet and income statement, as well as help you prepare for subsequent accounting files. Finally, the Home page offers you a quick way to jump to various points in the GridTracks document.
Accounts
Accounts and Modify Accounts pages
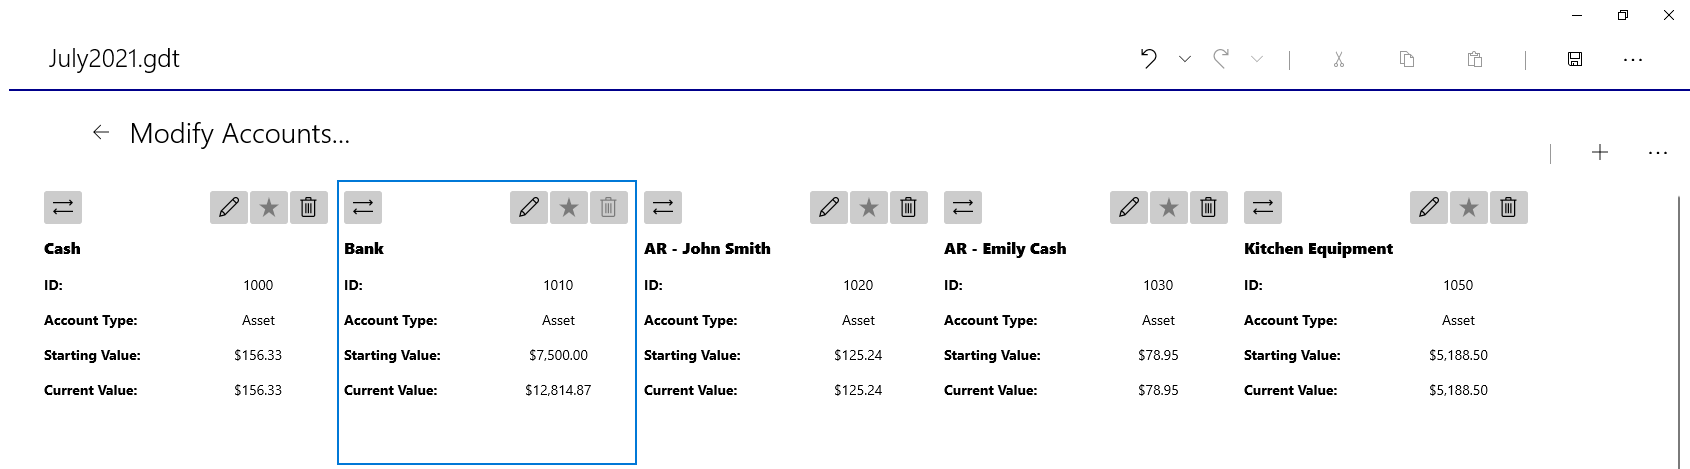
This page allows you to see your variously created accounts as a list on the left hand side. When you have an account selected, you will see the account entries of that account on the right-hand side. Note that highlighted in red is the Modify Accounts…, which will take you to a birdeye's view of all your accounts, as shown by the second image below.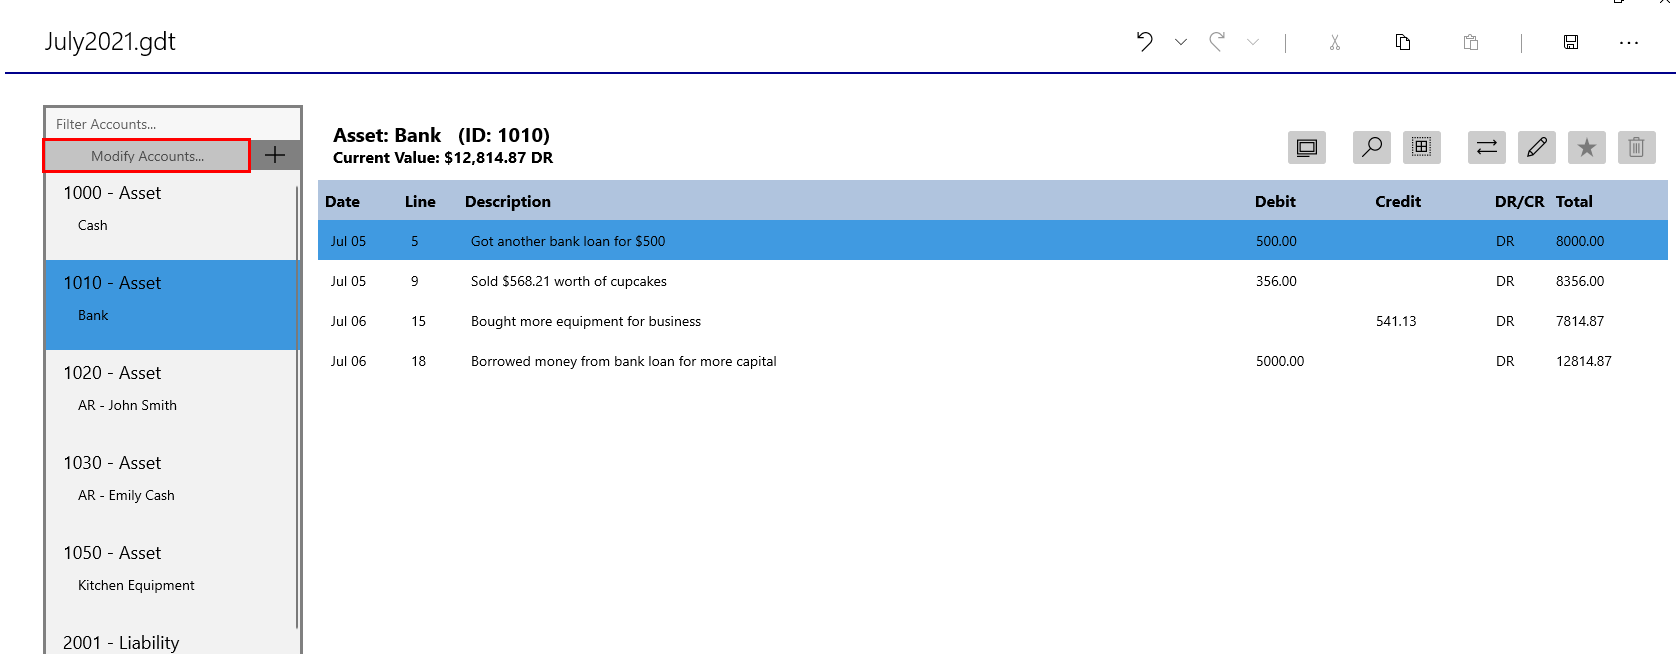
Tasks for Accounts page
| Task | Steps |
|---|---|
| Add a New Account |
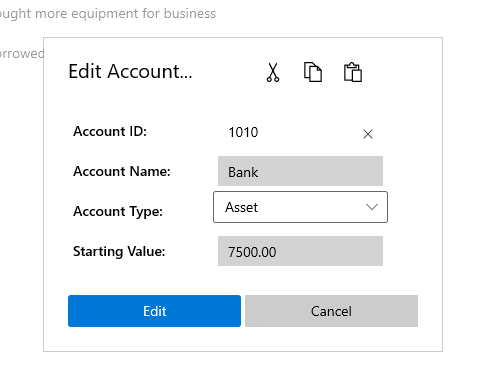
By clicking on the Add button on the top left, you will be greeted with a dialog box where you can fill in the data for the account to add. Note that the account ID must be an integer between 1-9999, and that Account Name must not be left blank. Account type can only be an asset, liability, expense, revenue, O. Equity (DR)—for dividends or drawings, or O. Equity (CR). Please also note that in all aspects of this program, accounts are sorted by account ID only, so make sure that accounts of the same type have appropriate account IDs. 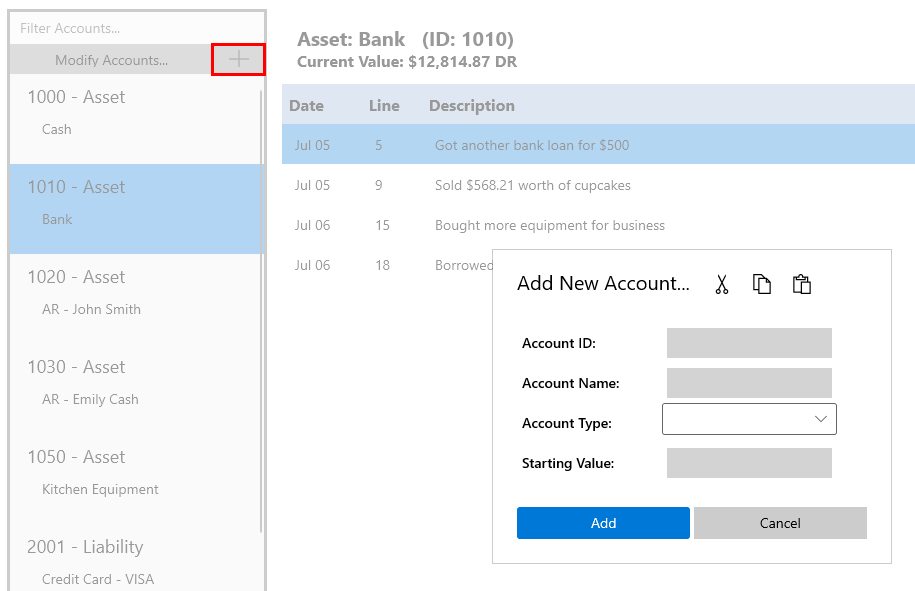
|
| Editing Account Information with Side Bar |
On the left side of the Accounts page, it will display the account name and account ID of the active account (selected in the Accounts list). 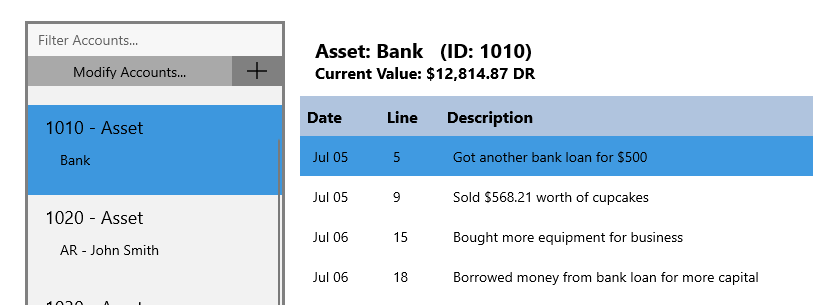
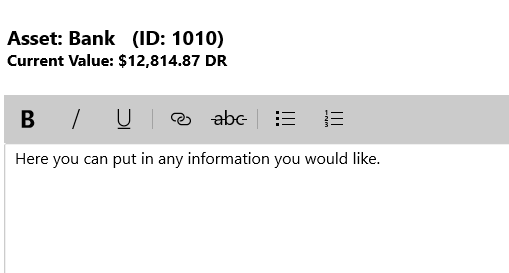
On the right side there is a sidebar that allows you to manipulate the active account in question. Note that in the image below, numbered from 1-7, consists of View Account Description (1), Find within Account (2), Enable/Disable Multi-Select (3), Toggle to Journal Entry (4), Edit Account (5), Toggle Account Active/Deprecated (6), and Delete Account (7). 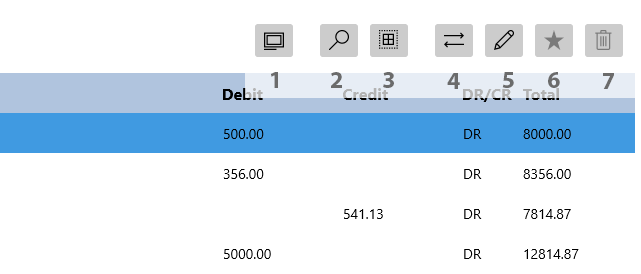
|
| Filter Accounts List |
At the top left corner of the Accounts page, there is a filter box if you are interested in filtering to find a specific account. 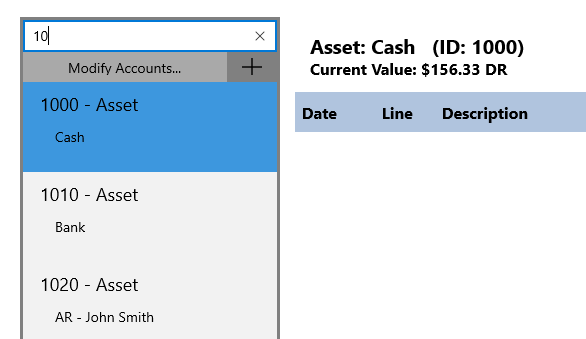
|

Tasks for Modify Accounts page
| Task | Steps |
|---|---|
| Go back to Accounts page |
To go back to the Accounts page from Modfiy Accounts…, just hit the arrow. 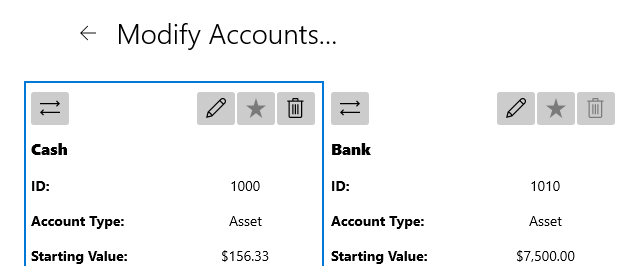
|
| Add New Account |
If you look on the top right corner of the Modify Accounts page, you will notice a + button. Clicking that will allow you to create an account using the same dialog box as in the Accounts page. 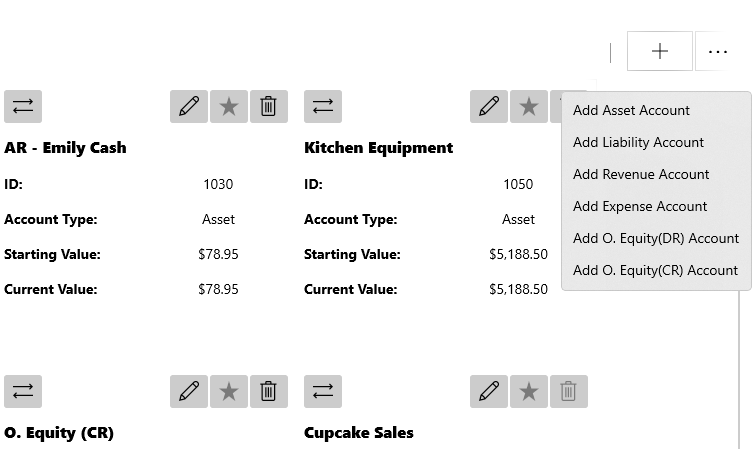
|
| In Editing Account |
By hitting the Edit button on a particular account, it will allow you to edit various aspects of the account. Use "Confirm" to accept changes, and "Cancel" to discard them. 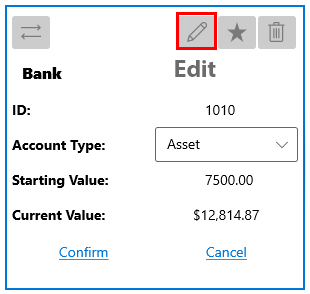
|
| In View Mode Account |
If account is not in edit mode, you are able to do other things to the account, such as toggle to account in Accounts, deprecate an account, or delete an account. 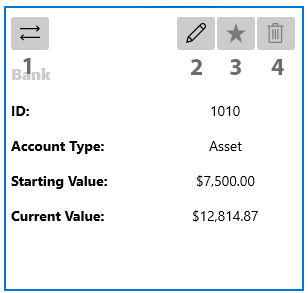
In the case of Activate/Deprecation or Deletion of an Account, please refer to this part of the Accounts quick-start for a more in-depth explanation. |
| Check totals for Starting Values |
As you continue to add/edit accounts, GridTracks will keep track of how many debits and credits exist determined from the starting values. It is important to make sure your starting values are balanced, because GridTracks will not enforce this. However, because all journal transactions added to the General Journal must be balanced, if your starting values are not balanced, then nothing will ever be balanced. 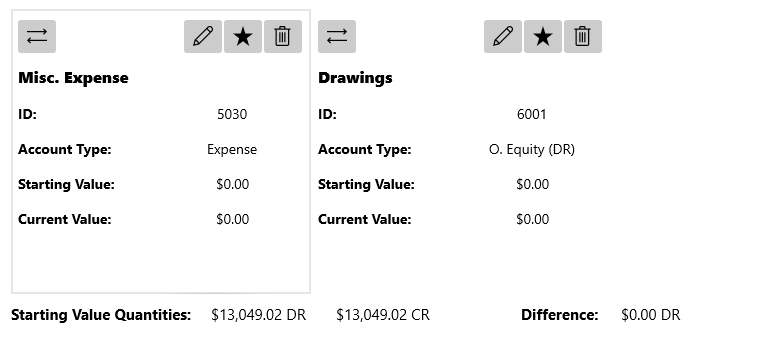 . .
Totals are located at the bottom of the Modify Accounts page. Difference is also outputed to make balancing more convenient to figure out. |
Account Entries in the General Ledger
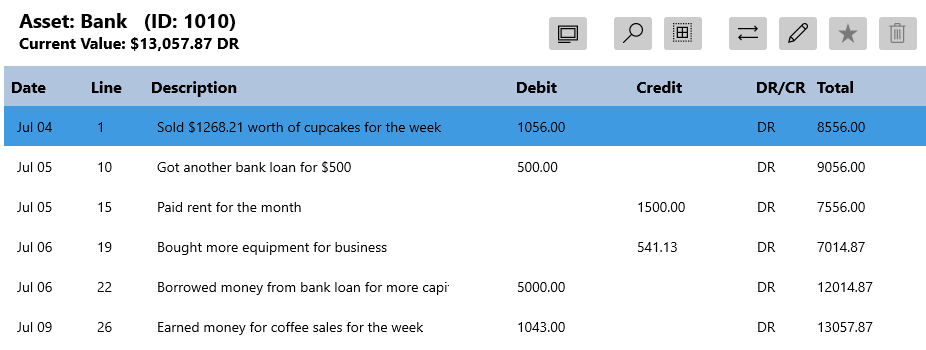
Description of Columns
-
Date
The date that the journal entry occured in the General Journal.
-
Line
Within every journal entry, the accounts debited and credited appear on their own lines, preceding the description and blank lines. Line repressents the line number in the General Journal where these posts were made (to each respective account).
-
Description
The description provided for the journal entry (from the General Journal).
-
Debit/Credit
The amount the account is debited or credited by (should only have a post in either the Debits or Credits column but not both).
-
DR/CR
If it is DR, then it means the total below is a debit balance, while CR would represent a credit balance for the total.
-
Total
The total value of the account given the account entry applied to the account.