
Quick Start Guide
Navigation
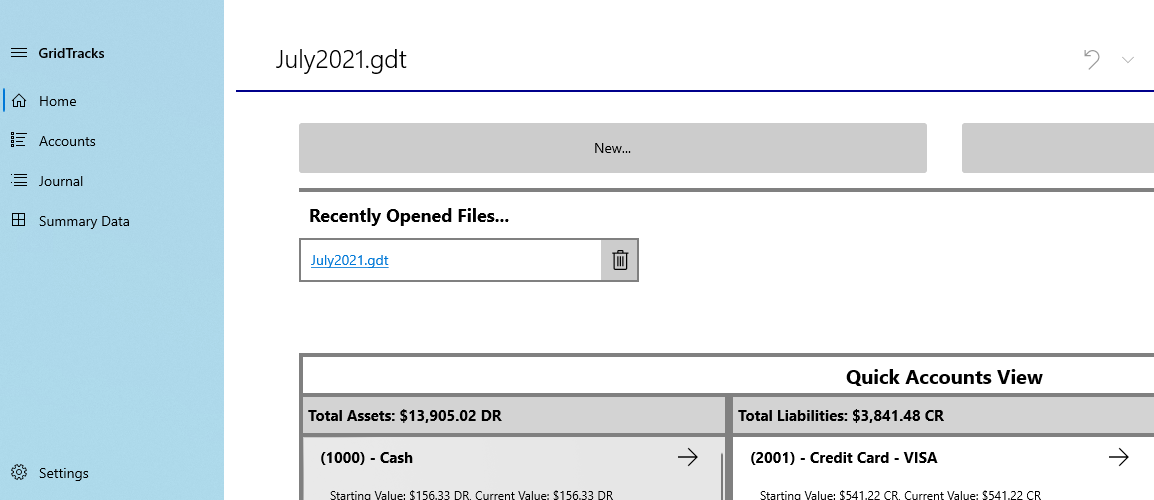
Note that when you open GridTracks, you will be greeeted with this navigation menu on your left-hand side. You will have access to the Home, Accounts, Journal, Summary Data, and Settings pages. Click on the links in the previous line for more details.Note that the titlebar also contains Undo/Redo, Cut-Copy-Paste, Save, Save As…, Export to Excel, and a Feedback Button on the top-right corner.
Quick Start Instructions
More on each page:
- Home
- Accounts
- General Journal
- Summary Data
- Settings
Note that if this is the first time using the app, I recommmend starting with the Accounts page, as you must first create accounts before you can add anything to the General Journal. Of course, after that you should check out how to use add/edit transactions in the General Journal. After that, look at Summary Data, where you can view your balance sheet and income statement. Furthermore, the Settings page will allow you to customize your balance sheet and income statement, as well as help you prepare for subsequent accounting files. Finally, the Home page offers you a quick way to jump to various points in the GridTracks document.
General Journal
General Journal and Add/Edit Journal Transaction
This page allows you to view and manipulate all journal entries within the document. Note that hitting "Add Transaction" or "Edit Transaction" will take you to the Add/Edit Journal Transaction page as shown under "Tasks for Add/Edit Journal Transaction" page.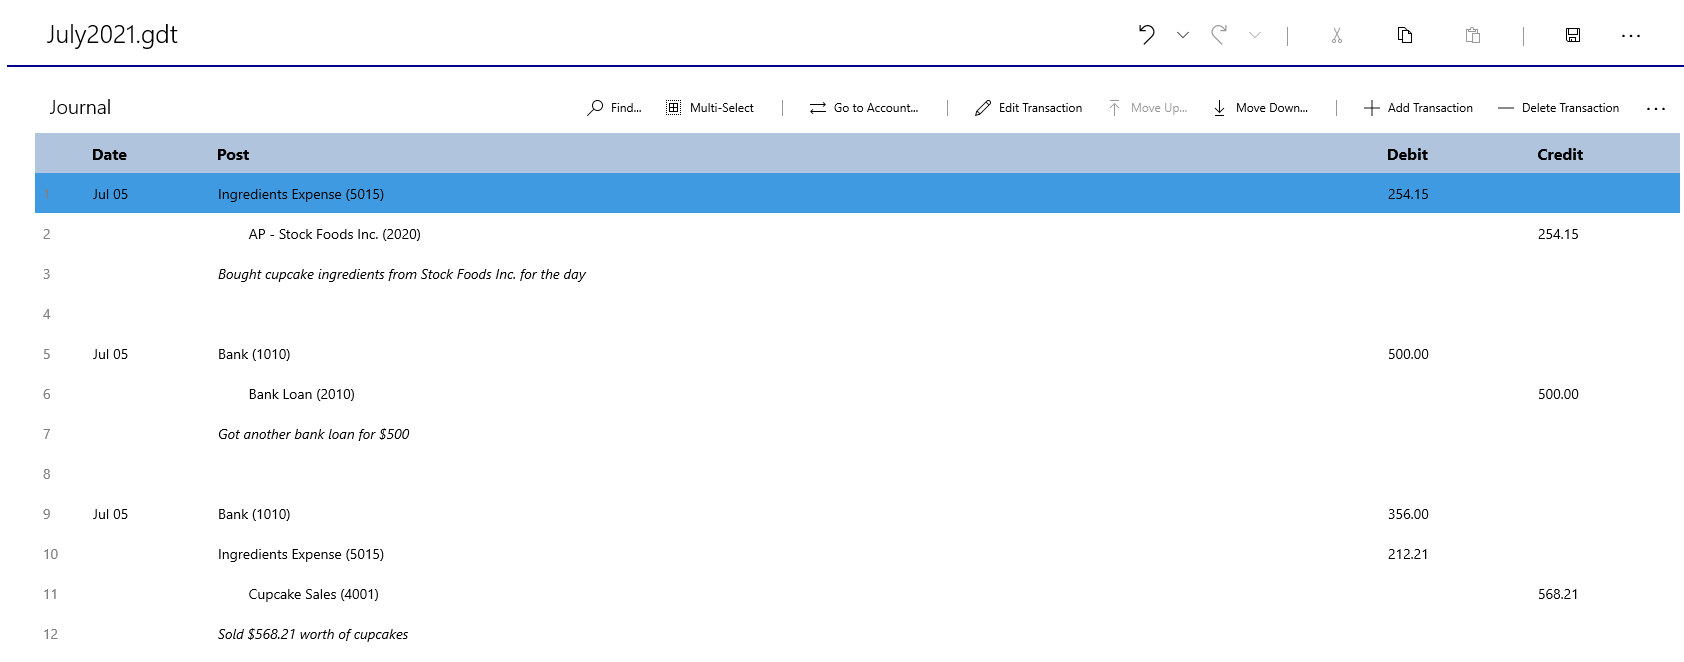
Tasks for General Journal page
Below is the commandbar for the General Journal:
Note that the General Journal Commandbar has seven actions. Find…, Multi-Select, Go to Account…, Edit Transaction, Move Up…, Move Down…, Add Transaction, and Delete Transaction.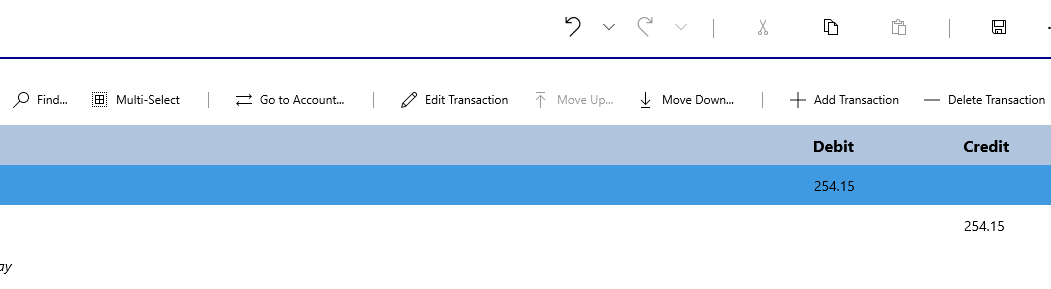
| Task | Description |
|---|---|
| Find… |
Just like in the accounts, you are able to perform a text search on journal entries in the General Journal. 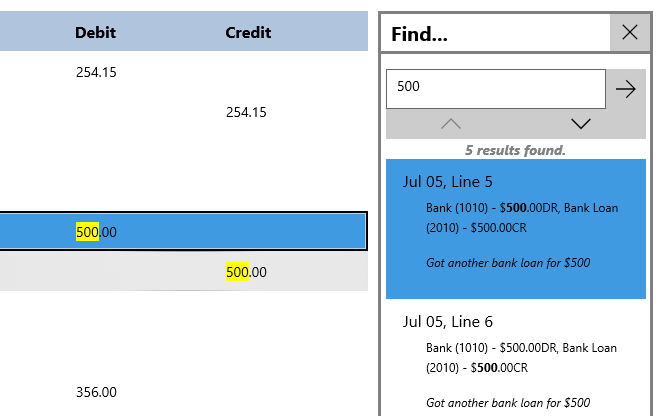
|
| Multi-Select |
You can also toggle multiple selections, for copy-to-clipboard purposes. Note that all other journal modifications are disabled while in multi-select mode. 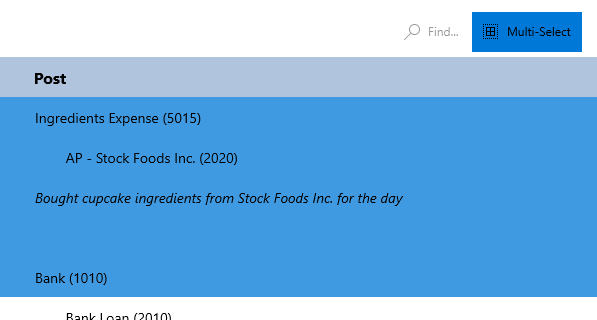
|
| Go to Account… |
If you select a debit or credit post, you are able to toggle to the account of the post. For example, in the image below hitting "Go to Account…" would take you to the account: "Ingredients Expense" with Account ID: 5015. 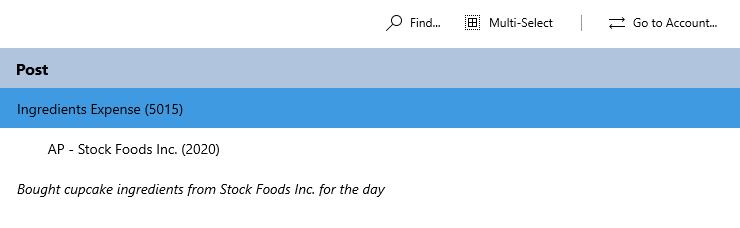
|
| Edit Transaction |
By hitting Edit Transaction, you will be taken to the "Edit Journal Transaction" page, where all the information will be populated from the editing transaction. |
| Move Up/Down Transaction |
If you have multiple transaction with the same date, you can choose to move a transaction up or down. For example, in the image below you could either move the transaction above the first or below the third, as they all have the same transaction date. |
| Add Transaction |
By hitting Add Transaction, you will be taken to the "Add Journal Transaction" page, where you can fill out the form to add a new transaction. |
| Delete Transaction |
This will delete the journal transaction of the currently selected line. |
Tasks for Add/Edit Journal Transaction page
| Task | Steps |
|---|---|
| Change date of transaction |
Modifying this will allow you to change the date for the posted transaction. It defaults to today. 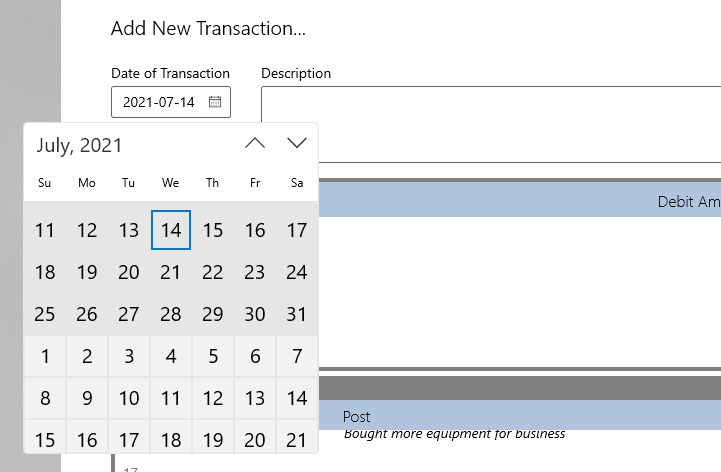
|
| Modify account description |
There is a textbox provided to provide a description for the journal transaction. It will show up in place of the [Description] line shown in image below. 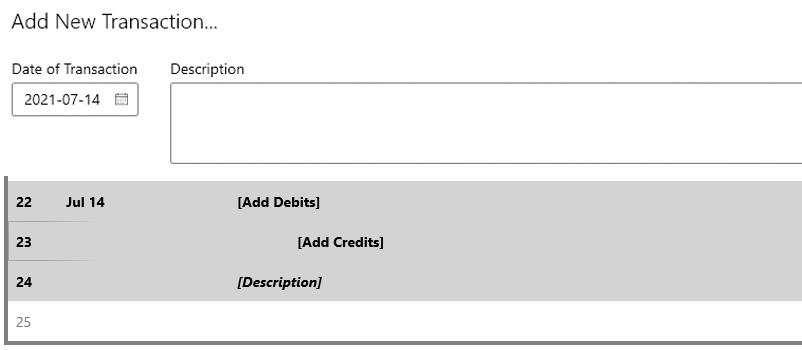
|
| Add a debit/credit entry |
All journal transaction must have at least one debit post and one credit post. This will represent how the transaction will affect the accounts in question. By hitting the "+" button, an input post will show up, with a dropdown for the account and a textbox for the transaction amount. Please note that at minimum, you can just post account ID to identify the account. Any accounts that are deprecated cannot be added to the transaction. Furthermore, the transaction amount cannot be negative or zero. 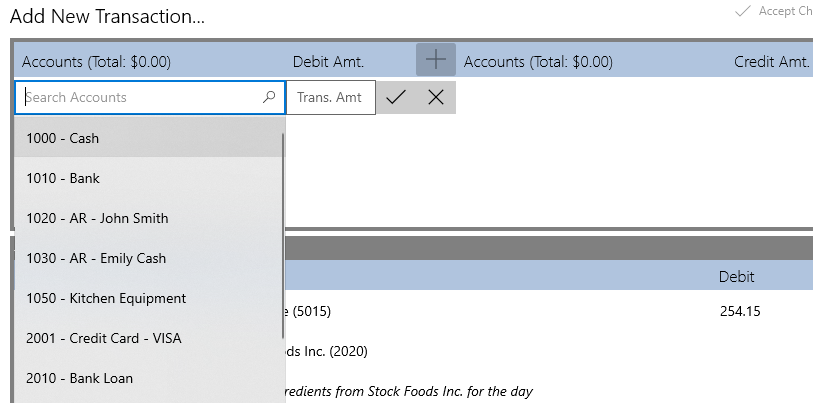
|
| View changes in Journal Preview |
While you are in "Add/Edit Transaction" mode, you can preview the current changes to the General Journal, in the Journal Preview section. Please note that it only shows a dozen or so lines above and below the location of the transaction being inserted (determined by the currently set date of the transaction). 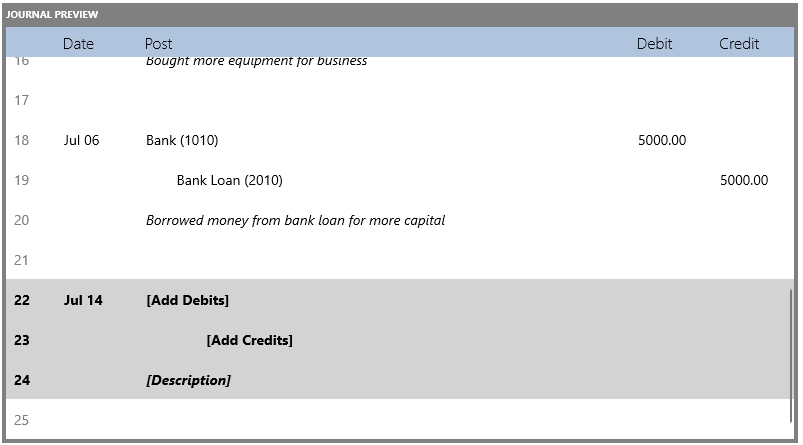
|
| Add a Cash Sales Receipt |
Note that at the bottom of the Add/Edit Journal Transaction page, there is an option to add a Cash Sales Receipt 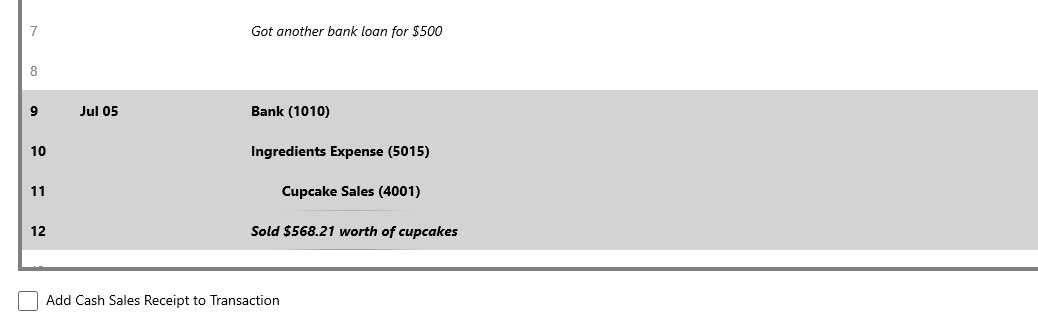 While you are in "Add/Edit Transaction" mode, you can preview the current changes to the General Journal,
in the Journal Preview section. Please note that it only shows a dozen or so lines above and below the location of the transaction being inserted
(determined by the currently set date of the transaction).
While you are in "Add/Edit Transaction" mode, you can preview the current changes to the General Journal,
in the Journal Preview section. Please note that it only shows a dozen or so lines above and below the location of the transaction being inserted
(determined by the currently set date of the transaction).
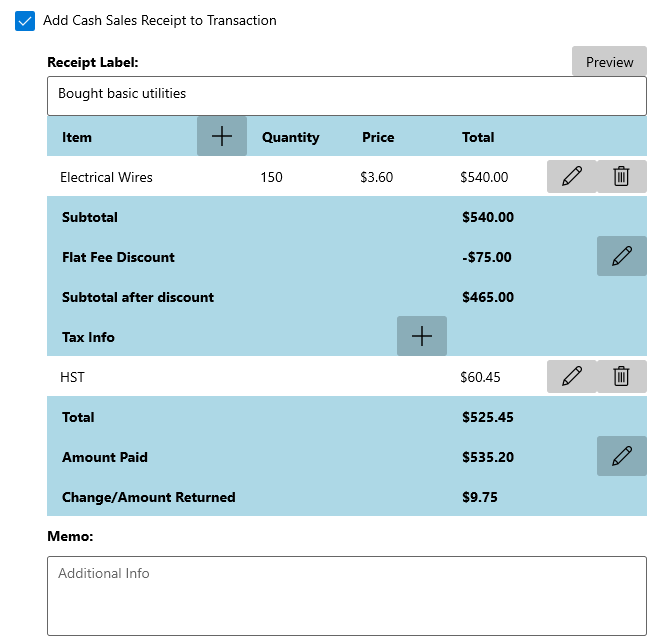
Here you can add multiple items to the receipt: 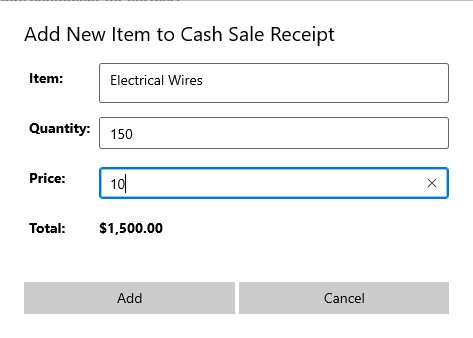
Can specify the discount amount as well as the label used to represent the discount (e.g. to specify whether the discount was percentage based or flat fee based): 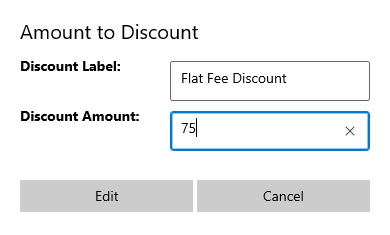
Adding tax information is possible through this dialog box: note that you can choose between perecntage-based or flat-fee-based taxes, or both as you can apply multiple: 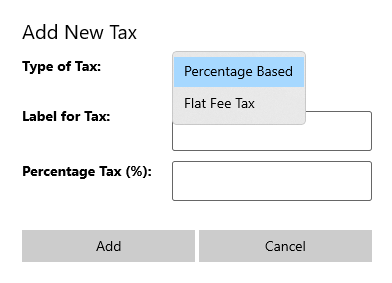
Final bit is the amount paid for this receipt: 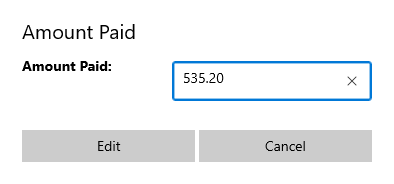
|
| View Cash Sales Receipt in Accounts and Journal |
Note that once a cash sales receipt has been added to a journal transaction, it will show up in the General Journal as part of the transaction, as well as the associated account entry in the Accounts View, by clicking on the Document button (highlighted in red below). In the General Journal: 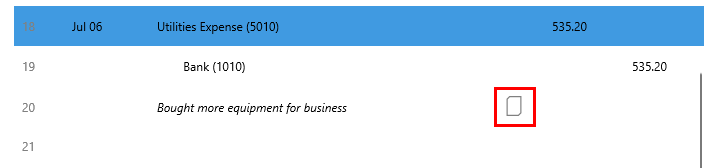
In the Accounts view: 
When you click on the Document icon, the cash sales receipt dialog box will show up: 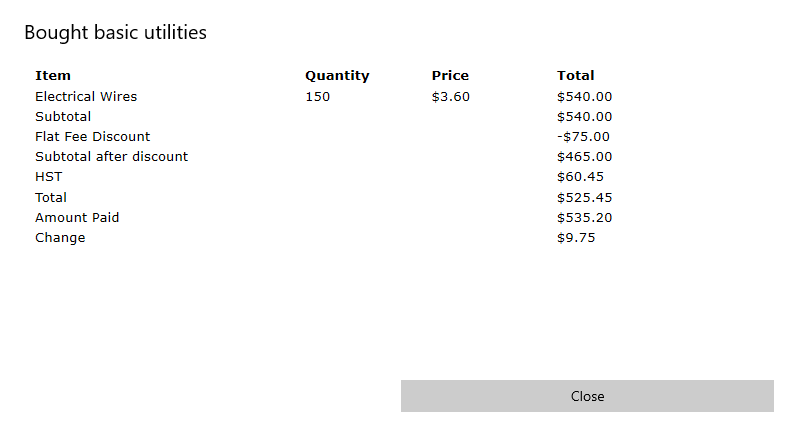
|
| At the end: Accept or Cancel Changes |
Once you are done with everything in the transaction, you can post the newly added or edited transaction into the General Journal. Please note that in order to post a transaction, a description must be provided, as well as balanced total debit and credit posts. To help you with balancing, the totals for debits and credits is provided. Once everything is completed, you can accept the changes. Of course, if you wish to cancel addition/editing of transaction, you may do so at any time by hitting "Cancel". |